Cisco CDR Reporting & Analytics | Installation Notes
Updating to the Latest Release
Generally this is a very fast process, however it depends a little on your environment. Also a disclaimer- if you are the administrator you are hereby encouraged to have some kind of backup solution in place.
Start here, whether you use Splunk Enterprise or Splunk Cloud
- Log in to Splunk as an administrator, and in the apps menu at the top of the page click “Manage Apps”.
- Use the search box at the top to search for“sideview”. This should bring up at least these two apps:
- Canary
- Cisco CDR Reporting and Analytics
- If either app has an “Update to X.X.X” link, click it and follow the instructions. We advise updating Canary first.
NOTE: when it asks you to login, it means with your username and password to the splunk.com website, not your Splunk account..
Exception: if you are using SHC (Search-Head Clustering) on Splunk Enterprise.
If you are running Splunk Enterprise and using SHC (Search Head Clustering) then your admins will just need to update “Canary” and “Cisco CDR Reporting and Analytics” on the Deployer node. As always, you (and your admins) can contact us at any time.
Exception: If your Splunk deployment has been configured to disable in-product updates from Splunkbase.
If this is the case then you won’t see any “Update to X.X.X” links on the Manage apps page. It’s OK — if you are the administrator you can still proceed as follows
- Visit these pages, login using Splunk.com credentials, and click Download to download the following apps to your local system as tar.gz files.
NOTE: It can be any splunk.com account and it does not need to be the official account tied to your Splunk Enterprise or Splunk Cloud license.- Canary https://splunkbase.splunk.com/app/4697
- Cisco CDR Reporting and Analytics app https://splunkbase.splunk.com/app/669
- Log in to Splunk as an administrator, and and in the apps menu at the top of the page click “Manage Apps”.
- For both of the downloaded apps, click the second button in the upper right, Install app from file.
- Follow the little wizard each time, selecting each file in turn.
- You WILL need to check the “upgrade app” option each time.
- You do not need to restart Splunk in between the two apps – just be sure to do it after the second app is installed.
- If for any reason it doesn’t ask to restart after the last one, you will still need to restart Splunk nonetheless. Please click Settings then Server Controls, and restart Splunk from there.
Updating the app’s license (if needed)
- Whether it’s a trial license or a production license, find your new license key, which should be in an email from us and clearly marked.
- Log into the Splunk UI as an admin user.
- Open the Cisco CDR Reporting and Analytics app.
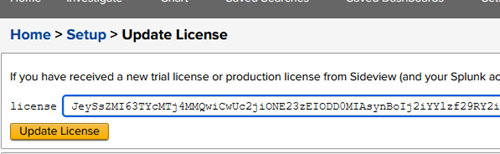
- Click Admin, then Update license.
- Paste in your new license key, then click the Update License button.
- After updating, you’ll see license information including company and expiration date.
Updating forwarders (very rare)
New versions of the TA for Cisco CDR Reporting and Analytics only come out very rarely, but they do come out. When that happens you’ll need to update your forwarder.
- Download the TA directly from Splunkbase.
- Save the file onto your local system.
- Use Gunzip and tar, or an application like Winzip, to uncompress the .tgz file.
- With 7‑zip on Windows …
- Right-click on the file, select 7‑zip -> “Open Archive”
- Drill down until you see a folder called “TA_cisco_cdr”
- Drag/Extract that folder to a temporary location on your system.
- With gunzip or tar, we’re not giving any hints unless you ask specifically. We figure you wouldn’t be using those utilities unless you knew how to use them. 🙂
- With 7‑zip on Windows …
- Copy the TA_cisco_cdr directory into $SPLUNK_HOME/etc/apps/on your forwarder host.
NOTE: DO NOT move away or delete the existing TA_cisco_cdr that is there.
Your specific inputs and configurations are likely stored in a subdirectory within, at “TA_cisco_cdr/local/”,
Just copy the new directory directly over the old directory. If there are local conf files, we need them to remain, and they will NOT be overwritten by this copy. - Restart the Splunk instance on your forwarder host.
If you are using any of the following:
- The Splunk Deployment Server
- Multiple Forwarders
- Heavy Forwarders
- Or any other more interesting combination
Then see our docs on Advanced Forwarder Updating